7. Team Development With Git
| Author: | Nick Efford |
|---|---|
| Contact: | N.D.Efford@leeds.ac.uk |
| Status: | Final |
| Revised: | 2017-09-15 |
The aim of this worksheet is to give you further experience of working with Git, focusing on those aspects relating to developing software in teams. We assume you are familiar with basic use of Git from the work done in Semester 2 last year.
Useful background information can be found in Eric Sink’s Version Control By Example (especially Chapter 8), Chacon & Straub’s Pro Git and Westby’s Git For Teams.
Warning
This worksheet is a detailed simulation of how a pair of developers can collaborate using Git, by means of a shared remote repository.
It assumes that you have a functioning GitLab account and that you have configured an SSH key pair for it, as instructed in the worksheets for COMP1721 last year.
Make sure you read the instructions carefully and follow them exactly, as things will become very confusing if you miss a step!
7.1. Preparation
Before doing anything else, check whether you need to configure Git with your preferred text editor. In a terminal window, enter
git config --list
If you don’t see an entry for the
core.editorsetting, or if you see an entry but it isn’t for the editor you prefer to use, then you need to givecore.editora suitable value. Below are commands that will set it properly for Atom, Emacs and Vim.git config --global core.editor "atom --wait" git config --global core.editor emacs git config --global core.editor vim
Use one of these, or modify as needed if you prefer a different text editor.
Log in to your GitLab account and create a new private repository named
teamgit.This repository will be the means by which two imaginary developers, Alice and Bob, collaborate. Each of them will work on a local clone of this repository. Each will need to push their changes up to
teamgitso that these changes become visible to the other. Each will need to pull changes they don’t yet have fromteamgitdown into their local clone.On a Linux machine, create a directory for this worksheet, also named
teamgit. Download the shell scriptset-upinto this directory.Open two terminal windows. In each one,
cdinto the newly createdteamgitdirectory. These terminal windows will be used to represent the two developers, Alice and Bob.In the first terminal window, enter a command like this:
source set-up Alice USERNAME/teamgit
Substitute your actual GitLab username (which will normally be the same as your University username) for
USERNAMEin the above.This command will clone the GitLab repository and then configure the clone and the terminal window to simulate Alice’s working environment. You should see that the shell prompt and window title have both changed to
Alice.Leave the Alice terminal window open, then switch to the second terminal window and enter
source set-up Bob USERNAME/teamgit
(again, substituting your GitLab username for
USERNAME)This will create the equivalent simulated working environment for Bob.
Note
For the remainder of this worksheet, stay logged in to GitLab so that
you can monitor the teamgit repository, and keep the terminal
windows for Alice and Bob open.
7.2. Pushing Changes to a Remote Repository
Let us imagine that Alice contributes to the project first.
Go to the
Aliceterminal window. Use a text editor to create a file calledHello.javain theAlicedirectory, containing this code:class Hello { public static void main(String[] args) { System.out.println("Hello World!"); } }
Stage and commit these changes using the following commands:
git add Hello.java
git commit -m "First version of program."
Change the greeting string from “Hello World!” to “Hello Everyone!”, then stage and commit your change in a single step like so:
git commit -a -m "Changed greeting."
Make a third change to the program, so that it can issue a personalised greating to the user. The final result should look like this:
class Hello {
  public static void main(String[] args) {
    if (args.length > 0) {
      System.out.println("Hello " + args[0] + "!");
    }
    else {
      System.out.println("Hello Everyone!");
    }
  }
}
Stage and commit this change with
git commit -a -m "Issue a personalised greeting or a default."
You should now have three commits in the
Alicerepository.The
Alicerepository retains an association with the remote repository from which it was cloned. To see this, entergit remote
This should display
origin- the default ‘nickname’ that Git gives to the original repository from which this one was cloned. If you now entergit remote show origin
You will see further details about
origin- in particular, the URLs used for fetch and push operations.To push Alice’s changes up to the shared repository, do this:
git push origin master
This means ‘push changes to the
masterbranch of theoriginremote.’Enter
git log --graphin theAliceterminal window. (The reason for using the--graphoption will become clear in due course.)You should see something like this:
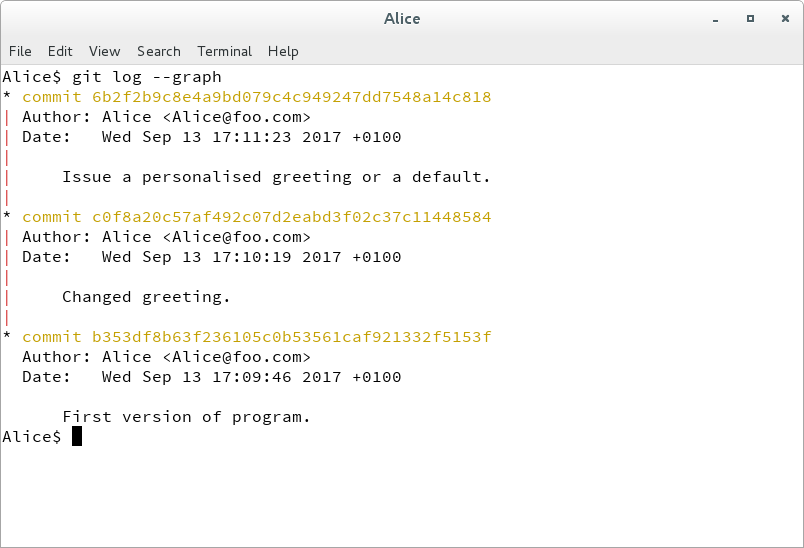
Alice’s repository, after her commits
If you try the same thing in the
Bobterminal window, you’ll get an error, as Bob has made no commits of his own yet and doesn’t have any of Alice’s either.Back in GitLab, click on the Repository link from the menu at the top of the page. Click Commits to view the commits as a simple list, then click Graph to view them as a graph. The latter should look like this:
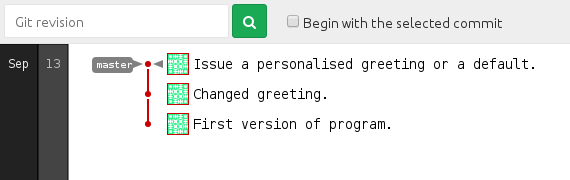
Graph of Alice’s commits viewed in GitLab
7.3. Retrieving Changes From a Remote Repository
Typically, this involves two operations. First, the fetch command is
used to bring in changes from the remote repository. These fetched changes
are stored in a special branch of your local repository. Then the
merge command is used to merge those changes with another branch - e.g.,
the ‘master’ branch that Git uses by default.
Git also provides a pull command, which essentially performs a fetch
followed by a merge. If you don’t wish to inspect fetched changes and are
reasonably confident of the merge succeeding, using pull will save you
a little bit of typing.
In the
Bobterminal window, fetch the changes fromoriginlike so:git fetch origin
You can see in the output from Git that it has created a new branch called
origin/master, containing the changes. It you entergit logat this point, it will still give an error, because the changes are not yet merged into themasterbranch of the local repository.Merge the fetched changes with the local repository like so:
git merge origin/master
This means ‘merge changes from branch
origin/masterinto the branch I am currently in’ (which happens to bemaster).Now try
git log --graphagain. You should see that theBobrepository now has the same three commits asAliceand GitLab.
7.4. Non-Conflicting Merges
What happens if both Alice and Bob are working simultaneously?
In the
Alicerepository, editHello.javaand change the default greeting in theelseblock from “Hello Everyone!” to “Hey Everyone!”. Commit your change with a message of “Changed default greeting slightly”.Switch to the
Bobrepository, editHello.javaand change the first part of the personalised greeting in theifblock fromHellotoGreetings. Commit your change with a message of “Changed personalised greeting.”Enter
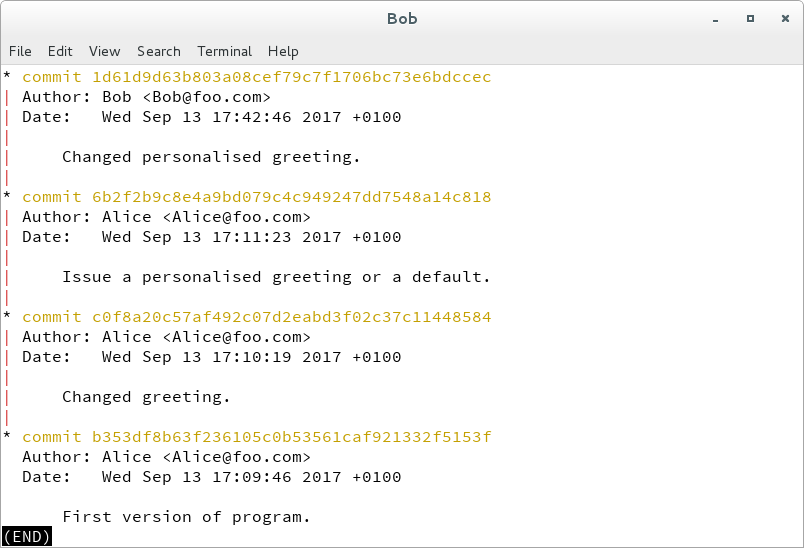
git log --graphin theAliceandBobterminal windows. You should see that the repositories now have divergent histories: the latest commits in each are different. These differences are purely local, however. Neither of the commits are present in GitLab yet.
Use
git push origin masterto push Alice’s changes up to GitLab. Then try performing the same operation for Bob.You should find that the Alice’s push succeeds, but Bob’s fails. Bob isn’t allowed to push because Alice has already pushed changes that he doesn’t yet have. It doesn’t matter that the changes are non-conflicting ones; Git requires Bob to fetch and merge those missing commits locally before allowing him to push.
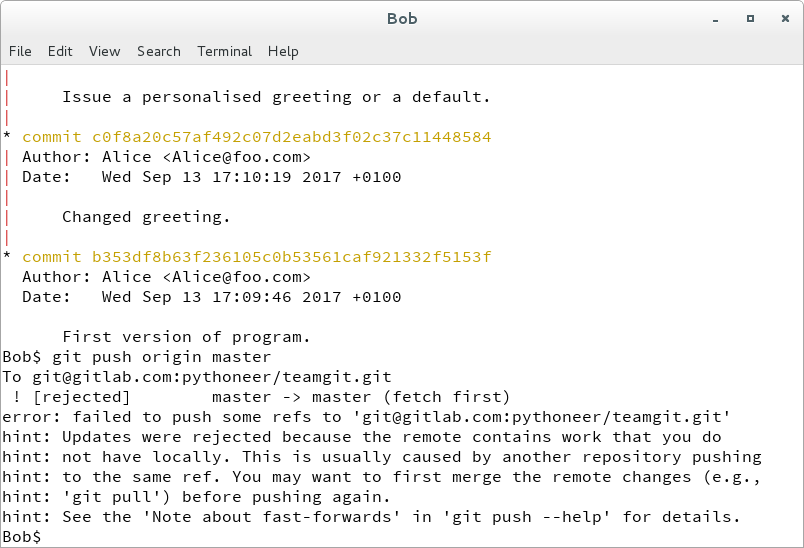
Bob’s failed push
To resolve the problem, start by fetching the changes that Bob doesn’t have. Enter the following in the
Bobterminal window:git fetch origin
This succeeds. (Remember that the changes are fetched into a different branch from the master branch in which Bob is working, so fetching alone won’t cause problems.)
Then attempt to merge the fetched changes with Bob’s changes, using
git merge origin/master
At this point, Git will probably start up your chosen text editor so that you can provide a message describing the merge. Leave the suggested text as-is, then save and quit the editor. This will cause a merge commit to take place. Git will report the result something like this:
Auto-merging Hello.java
Merge made by the 'recursive' strategy.
Hello.java |    2 +-
1 file changed, 1 insertion(+), 1 deletion(-)
Git can handle the merge automatically because the changes made by Alice and Bob do not conflict (they are made on separate lines of the file).
Note
If you don’t want to compose the merge commit message in a text editor, you can instead supply it on the command line using the
-moption, just as for regular commits.Try
git log --graphinBob. This will give you an ‘ASCII art’ representation of how the merge has combined the diverging histories resulting from Alice’s and Bob’s changes.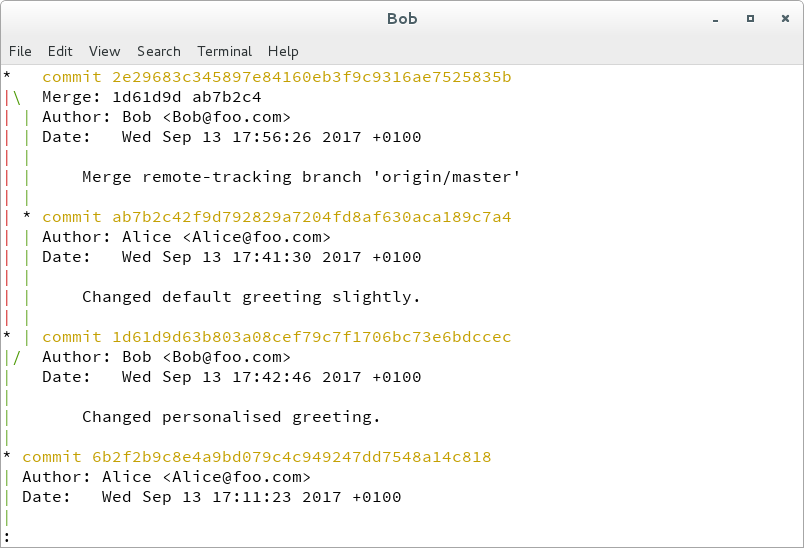
Result of merging in Bob’s repository
Try the
git statuscommand inBob. It will report that “your branch is ahead of ‘origin/master’ by 2 commits” (corresponding to Bob’s changes and the merge). This is a useful reminder that you need to push the changes back to origin. Do this now withgit push origin master
This time, the command will succeed.
To bring Alice up to date, do this in the
Alicerepository:git pull origin master
Note the use of a single pull command here, rather than separate fetch and merge commands. We happen to know that Alice hasn’t made any changes since Bob’s, so there is no need to inspect what has been fetched before attempting to merge.
Notice the output from Git:
Fast-forward
Hello.java | 2 +-
1 file changed, 1 insertion(+), 1 deletion(-)
‘Fast-forward’ is Git’s way of telling you that it has simply replayed Bob’s commits on top of Alice’s; there is no need to actually merge anything.
If you now run
git log --graphin theAlicewindow, you should find that it looks exactly the same as the output forBob. Both logs show identical histories of commits, each including the merge.If you refresh the Graph page on GitLab, it should now look something like this:
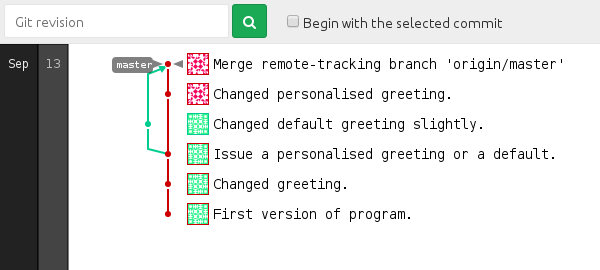
Alice,Boband the remote repository are all in sync.
7.5. Conflicting Merges
What happens to the merging process if Alice and Bob make changes that conflict - e.g., if they each change the same line of code?
In
Bob, modifyHello.javaso that it looks like this:import javax.swing.JOptionPane; class Hello { public static void main(String[] args) { if (args.length > 0) { JOptionPane.showMessageDialog(null, "Greetings " + args[0] + "!"); } else { JOptionPane.showMessageDialog(null, "Hey Everyone!"); } } }
Commit and push Bob’s changes using these commands:
git commit -a -m "Use a dialog box for greetings."
git push origin master
In
Alice, modify the line printing the personalised greeting so that it looks like this:System.out.println("Hey " + args[0] + "!");
Commit this change with
git commit -a -m "Use a different personalised greeting."
A push from
Alicewill, of course, fail - because Bob has already pushed his changes to GitLab. So you need tofetchfromoriginand merge locally inAlice, like so:git fetch origin git merge origin/master
You should find that the
fetchcommand succeeds but automatic merging fails, with an error like the following:Auto-merging Hello.java CONFLICT (content): Merge conflict in Hello.java Automatic merge failed; fix conflicts and then commit the result.
Edit
Hello.javaand you will see that Git has added conflict markers to highlight conflicting lines of code. Alice’s line appears between<<<<<<< HEADand=======, whereas Bob’s line appears between=======and>>>>>>> origin/master. If you are using version 1.18 or newer of the Atom editor, it will augment these with colour highlighting.
File containing conflict markers, as seen in Atom
At this point in our scenario, Alice must decide how to resolve the conflict. She can keep her changes and discard Bob’s, do the opposite, or somehow combine the two sets of changes. Some discussion with Bob may be advisable!
Change
Hello.javaso that it combines Alice’s and Bob’s changes, and remove the conflict markers. If you are editing in Atom 1.18 or newer, you can simply use the buttons that it provides to accept one or other set of changes, or some combination of the two. You should end up with something like this:import javax.swing.JOptionPane; class Hello { public static void main(String[] args) { if (args.length > 0) { JOptionPane.showMessageDialog(null, "Hey " + args[0] + "!"); } else { JOptionPane.showMessageDialog(null, "Hey Everyone!"); } } }
Save the file, then use the
addcommand to tell Git that you have resolved the conflict:git add Hello.java
Then run
git statusagain. Git will tell you that the conflict has been fixed but the merge is still in process.Now commit the changes using
git commit, without supplying a message. Your preferred text editor will start up, containing text like the following:Merge remote branch 'origin/master' Conflicts: Hello.java # # It looks like you may be committing a MERGE. # If this is not correct, please remove the file # .git/MERGE_HEAD # and try again. #Lines beginning with
#are treated as comments and are ignored by Git. The text before the#is Git’s suggested commit message. Change it or leave it as it stands, as you wish, then save and quit the editor [1].Do
git log --graphinAliceto inspect the history and see the merge that has just been committed. Then push the changes back up to GitLab withgit push origin master
Finally, use
git pull origin masterto update Bob’s repository. If you usegit log --graphin both terminal windows, you will see that Alice and Bob are consistent once again. The final commit graph in GitLab will look like this: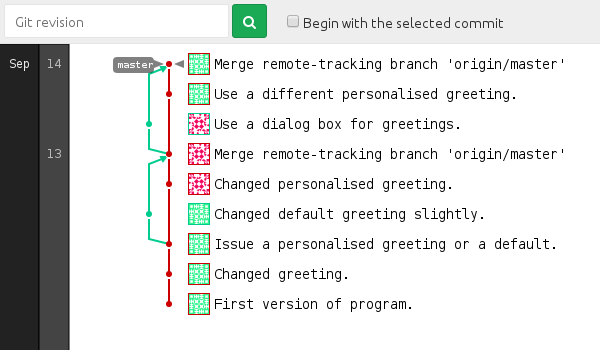
7.6. Next Steps
If you aren’t using Atom or IntelliJ and therefore aren’t benefiting from the support they provide for merging, you might want to investigate some of the specialised merge tools that can be used with Git. Atlassian’s conflict resolution tips page provides some pointers.
Note that this worksheet has covered only the most basic aspects of collaboration using Git. You need to learn more about branches, rebasing and the various Git workflows to become a fully capable user of Git. You’ll find the books mentioned at the start of the worksheet useful in this regard. Also useful are the following online articles:
- Rein Heinrich’s 2009 blog post on a Git workflow for agile teams
- Vincent Driessen’s 2010 blog post on a successful Git branching model
- The GitLab Flow best practices documentation
Additionally, the Learn Git Branching interactive tutorial is highly recommended.
| [1] | If you wish to abort the commit, simply remove all of the suggested text appearing before the comments, then save and quit the editor. |